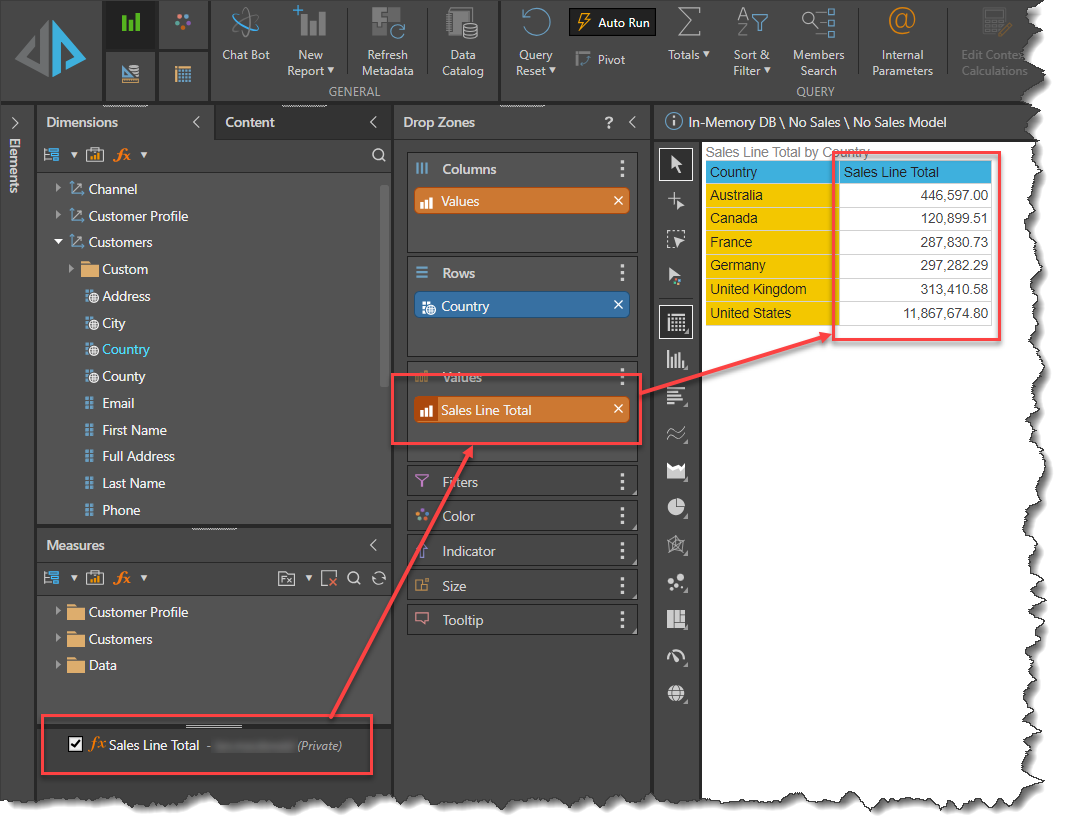
In this example a new Model Measure, [Sales Line Total] will be created based on two existing numeric attributes, [Quantity] and [Price]. this is a case of simple multiplication, but the multiplication calculated at the row level of the underlying table, calculating the [Sales Line Total] from each product's [Quantity] and [Price], resulting in the correct aggregated sales totals are calculated in the Semantic Model.
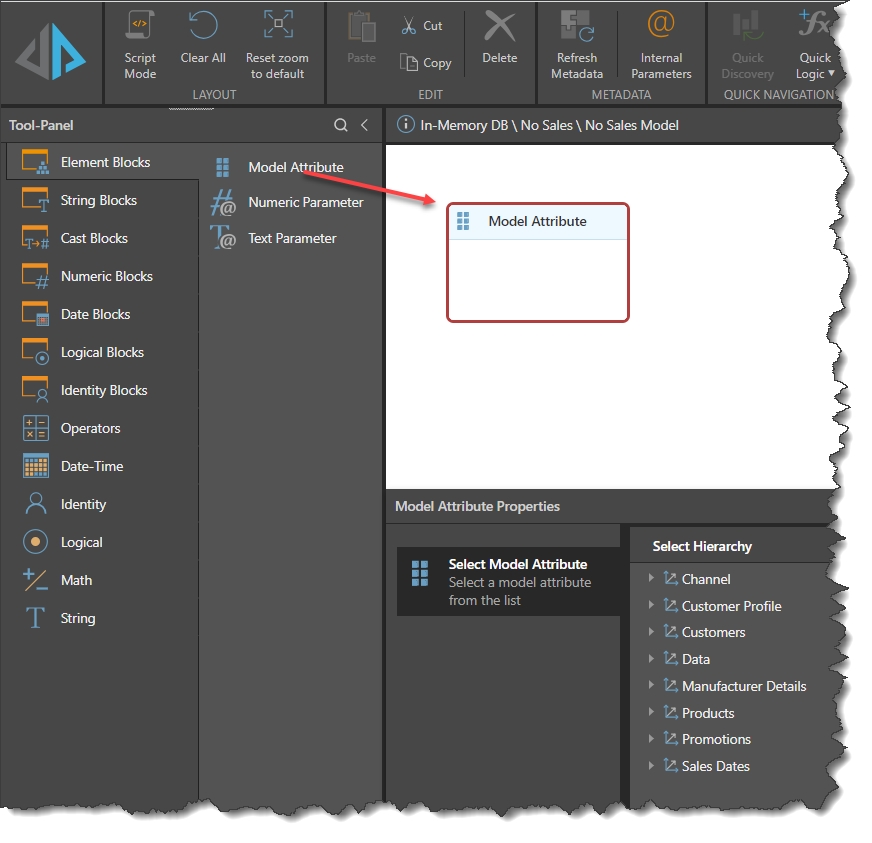
Step 1
Drag an attribute block onto the canvas
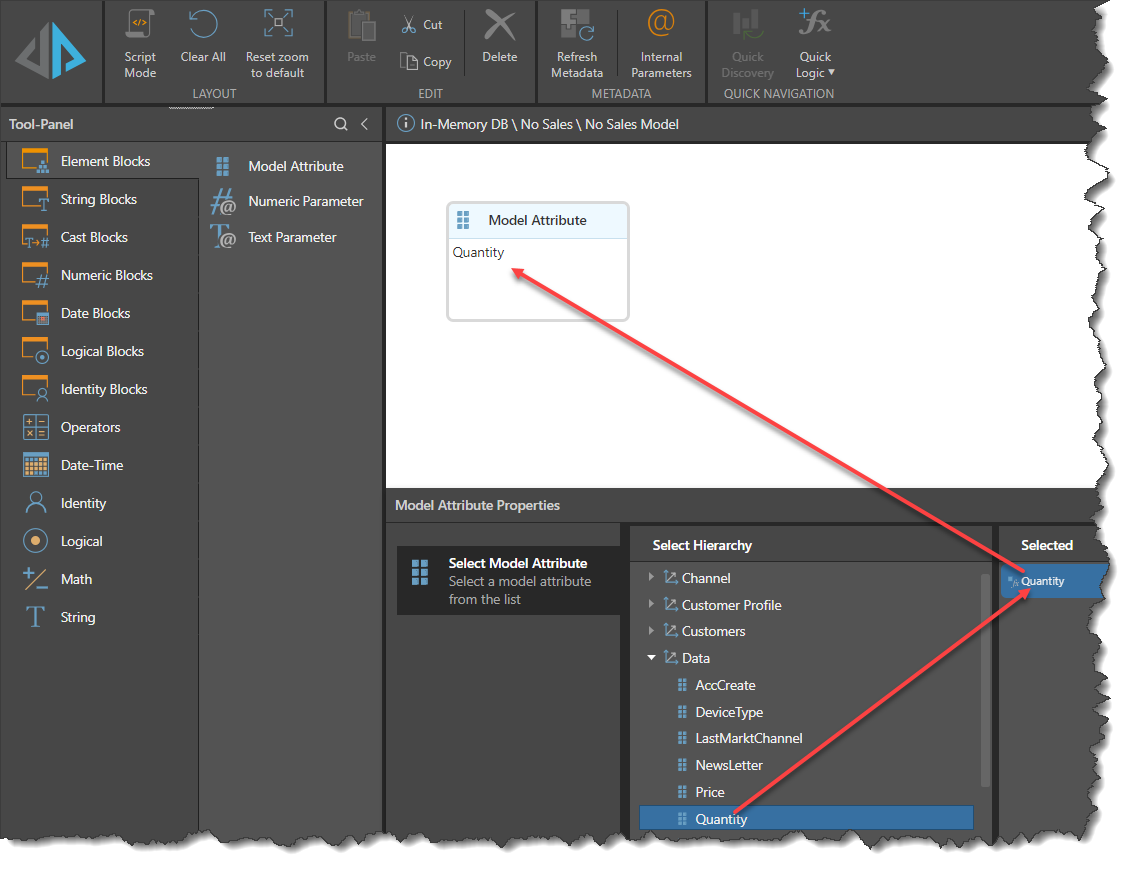
Step 2
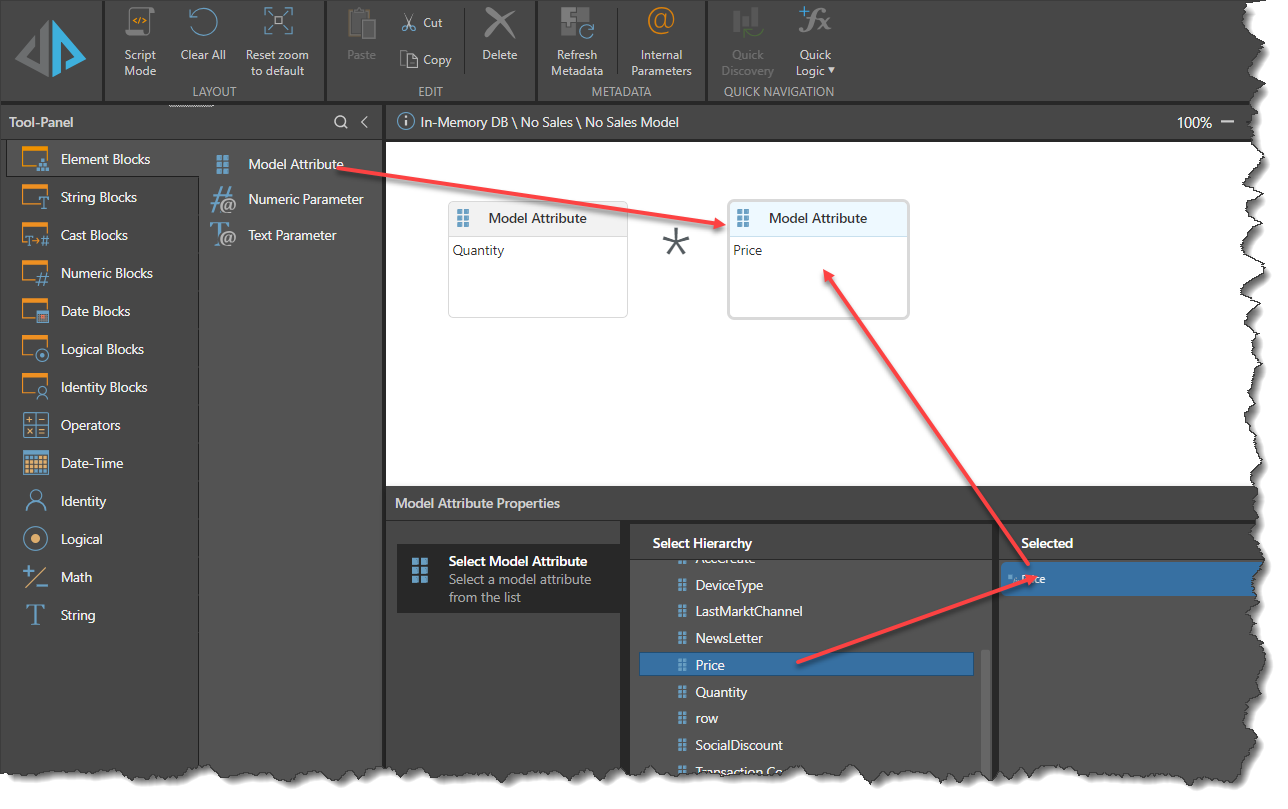
From the Model Attributes Properties Panel, choose the Attribute required by clicking on it. This will populate the block with the attribute details. In this case open the Data Dimension Table and click on [Quantity].
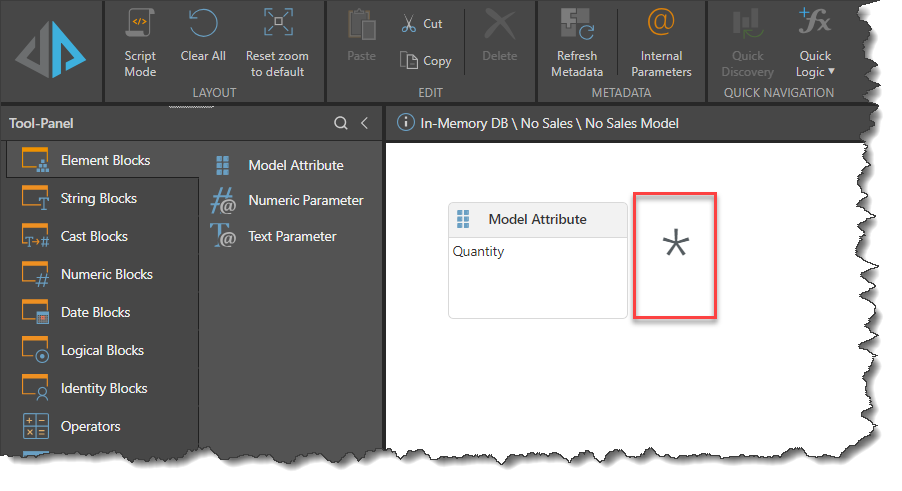
Step 3
In the canvas type the multiplication sign, "*"
Step 4
Drag in another attribute block and set it to [Price] from Data Dimension Table in the Attribute Properties Panel
Step 5
Click on the Pyramid icon top left to preview the results
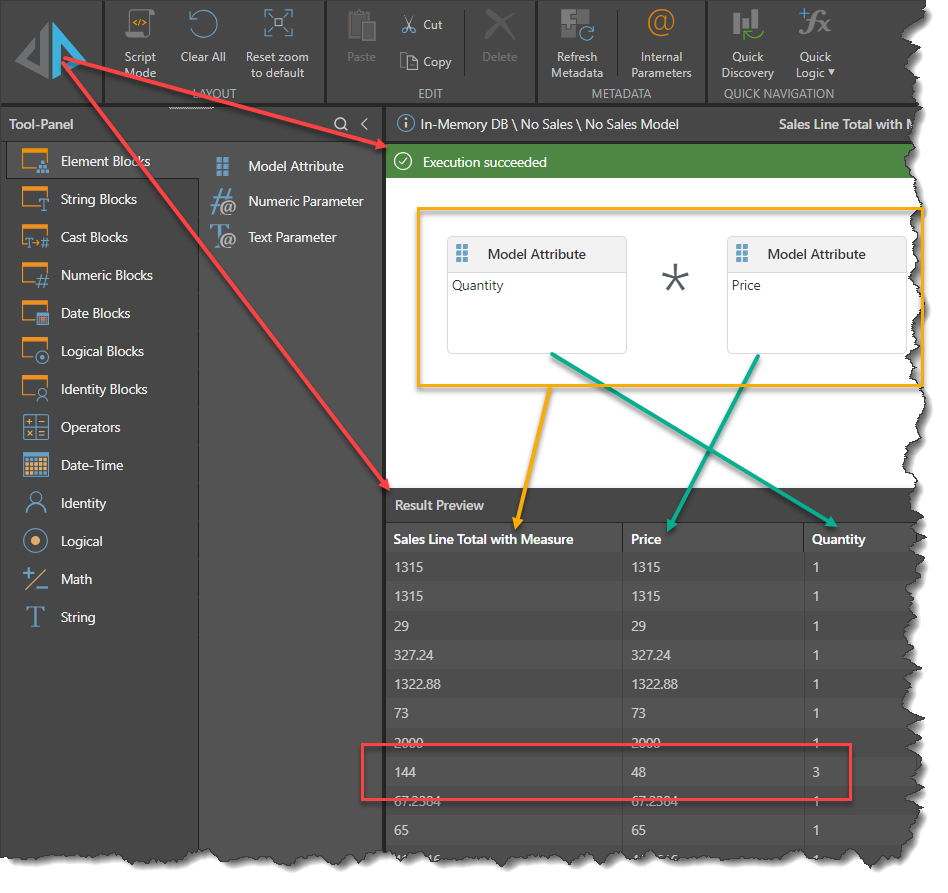
Note the values in the red box, [Quantity] of 3 and [Price] of 48 give [Sales Line Total] of 144
Step 6
In the Measures Properties Panel, click on the blue "+" sign to add a Measure definition for this attribute and fill out the required values.
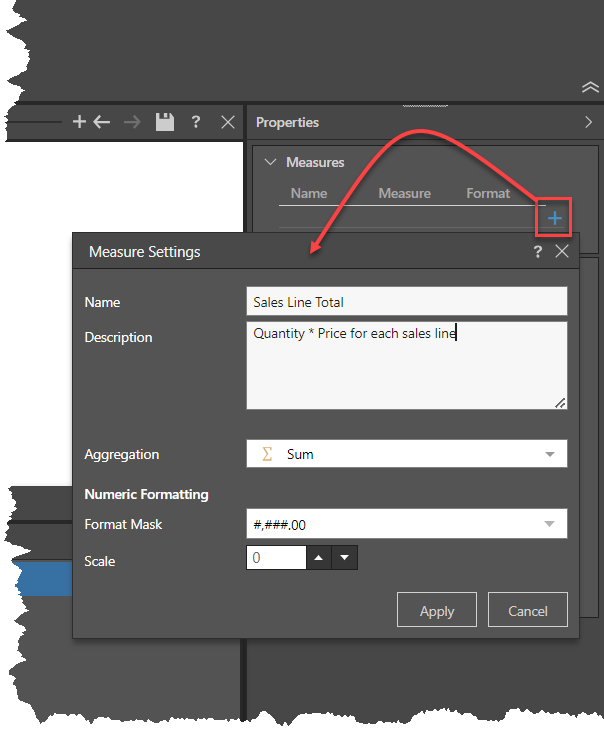
See Creating Measures for more details on Measure Settings. Multiple Measures may be defined from the same attribute with different aggregation rules.
Step 7
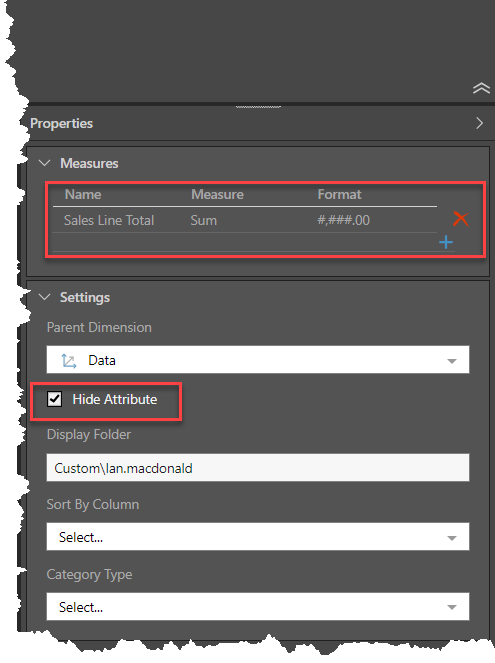
Set the values in the Settings Panel to reflect the requirements of the new attribute. Quite frequently when designing new Measures, the resulting attribute is hidden as this will be used to aggregate values rather than show individual values as Members of a Attribute.
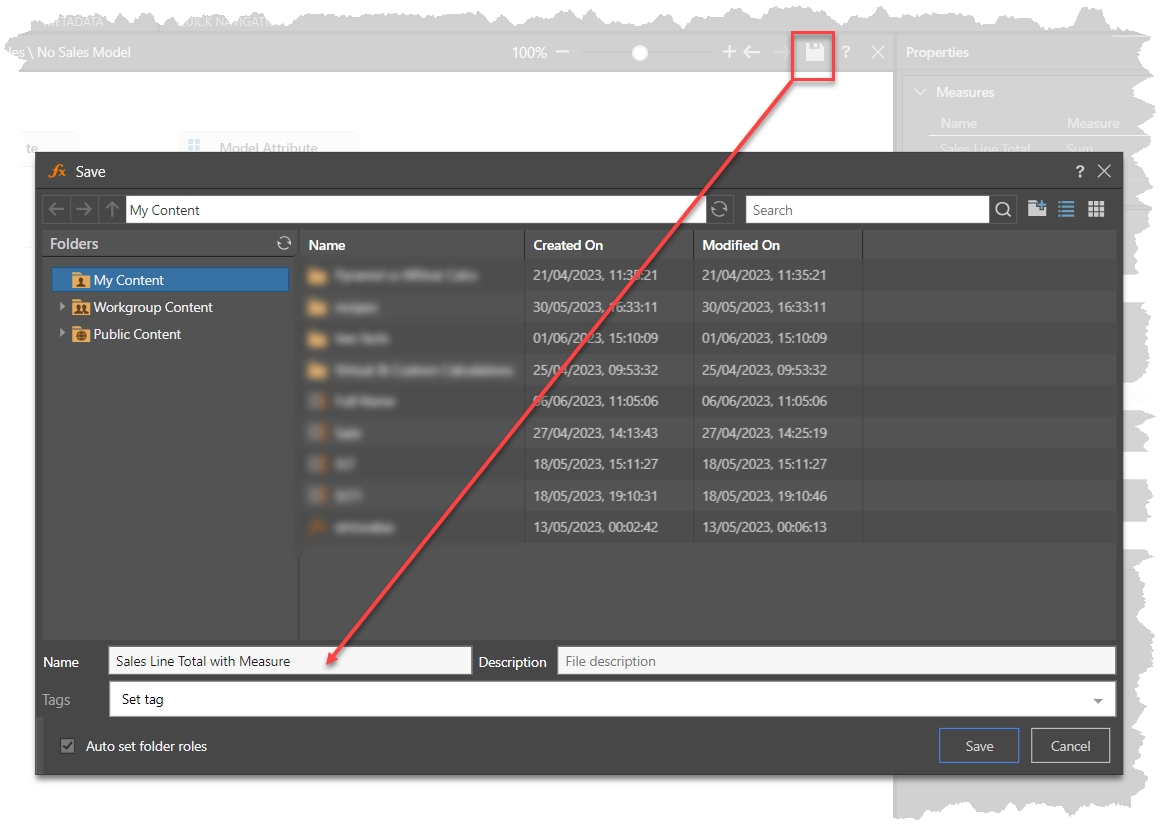
Step 8
Click on the Save icon to save into the target folder with the chosen name. Note the this will be the attribute name, the Measure name(s) is defined in the Measures panel.
Step 9
Click on "Quick Discover" in the Ribbon to see the new Measure in a Discover view. The new Measure will appear a a new calculated Measure in the Custom Measures Panel.